# AP Check Run Approval Process
Read Time: 2 minute(s)
# Overview
This process only applies to check runs created from AP.P1.
Checks created via CHECKS.E, CHECKS.E4, or COMM.P3 (commission check run process) do not require approval.
# Setup
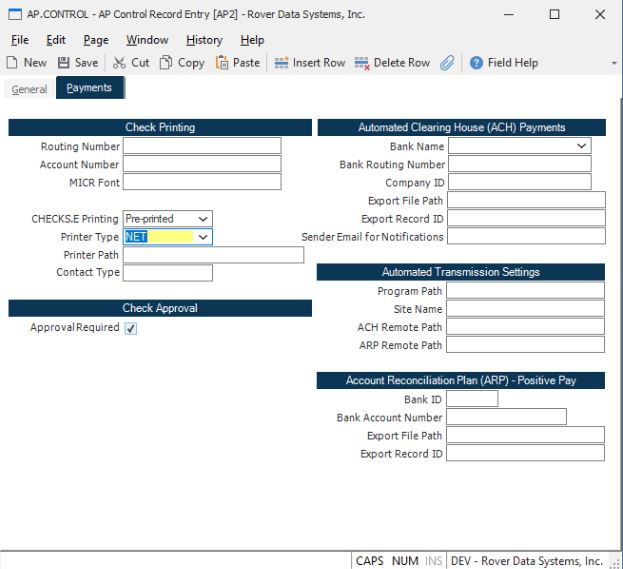
In AP.CONTROL, check the Approval Required box.
- If this box is not checked, you can print/post check runs that have not been approved
# 
# Process Steps
1. Create the Check Run
Create the check run in AP.P1 as you normally would.
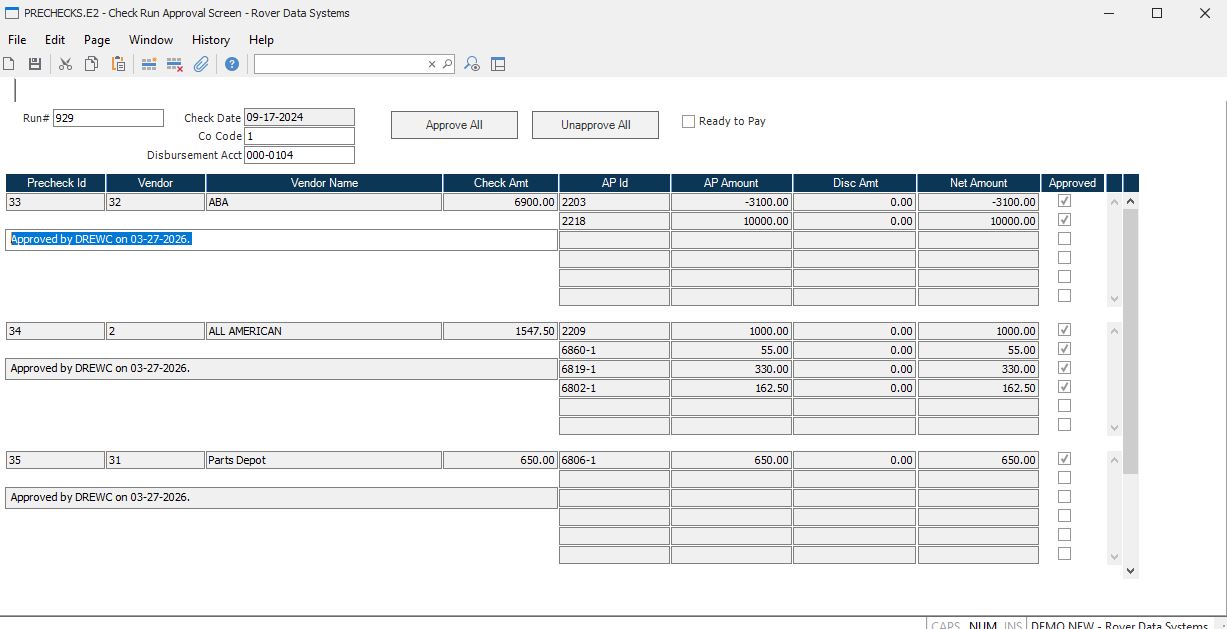
2. Approve Invoices in PRECHECKS.E2
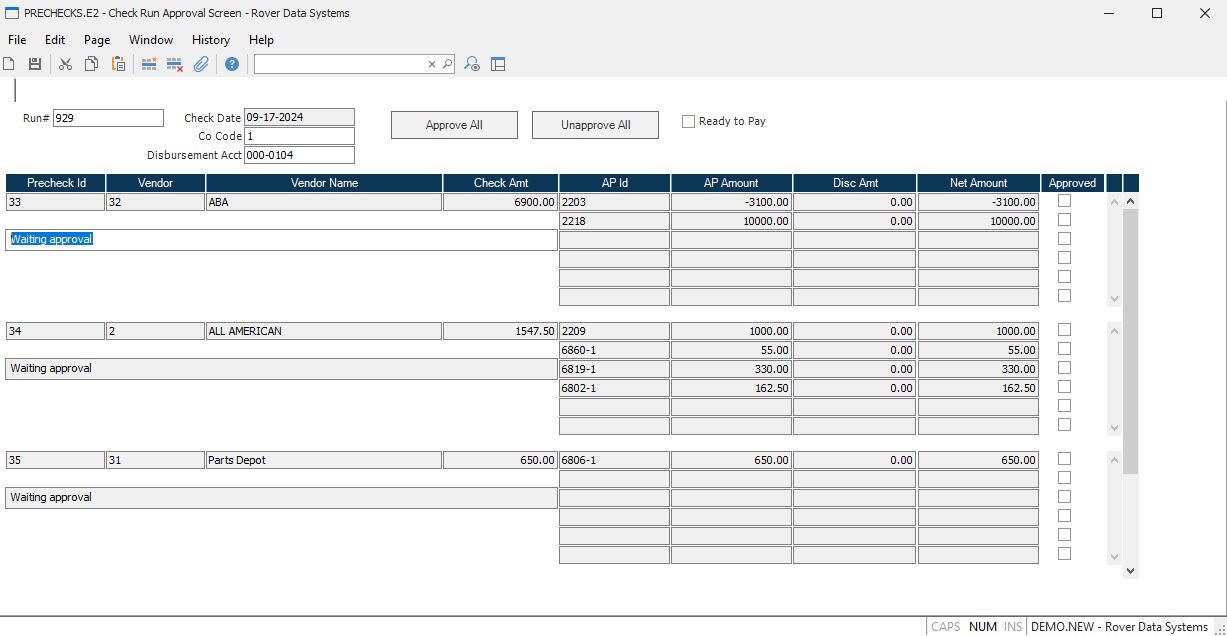
Open the check run in PRECHECKS.E2 to approve invoices.
- The Approve All button will check the Approved box for all AP IDs
- The Unapprove All button will uncheck the Approved box for all AP IDs
- When you first open the run in PRECHECKS.E2, the status message will show as "Waiting Approval" because no invoices have been approved yet
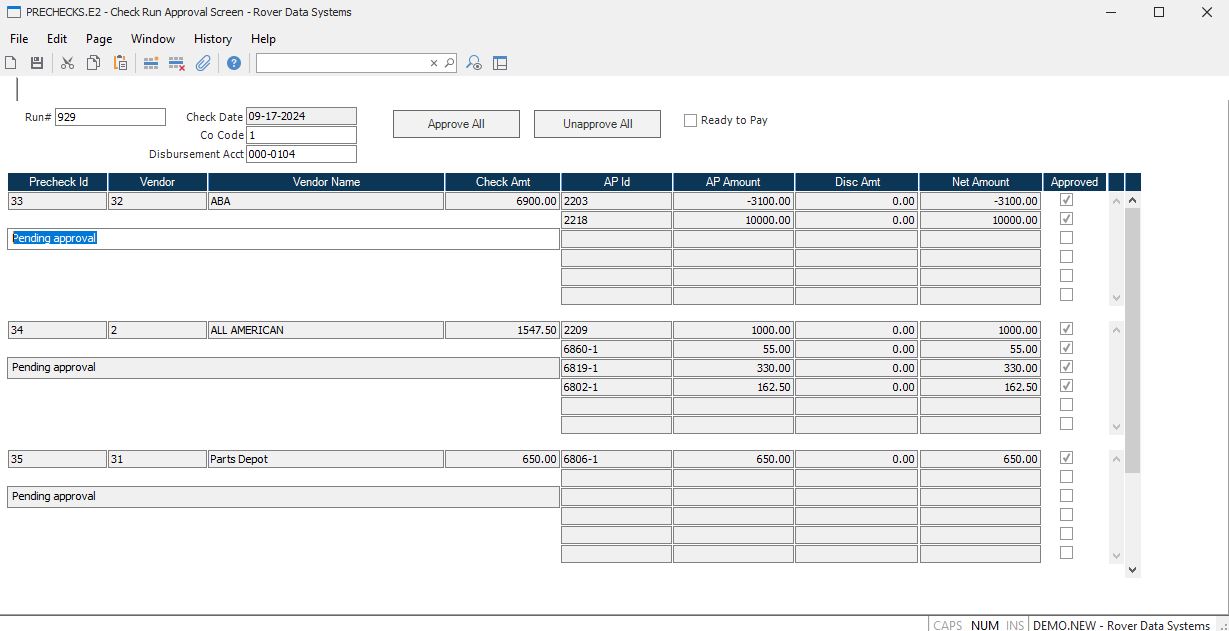
Once saved, the system will remember which invoices have been approved or unapproved. The status will change to "Pending Approval".
3. Mark Ready to Pay
When ready to print the checks, check the Ready to Pay box.
- When the record is saved, any invoice that is not marked as approved will be removed from the PRECHECK record
- For example, if AP ID
1-9was not approved, it will no longer appear in PRECHECKS.E2 - The status message will show who approved the ID and when it was approved
4. Reapproval After Changes
If any changes are made in PRECHECKS.E, the record will need to be reapproved.
# Important Notes
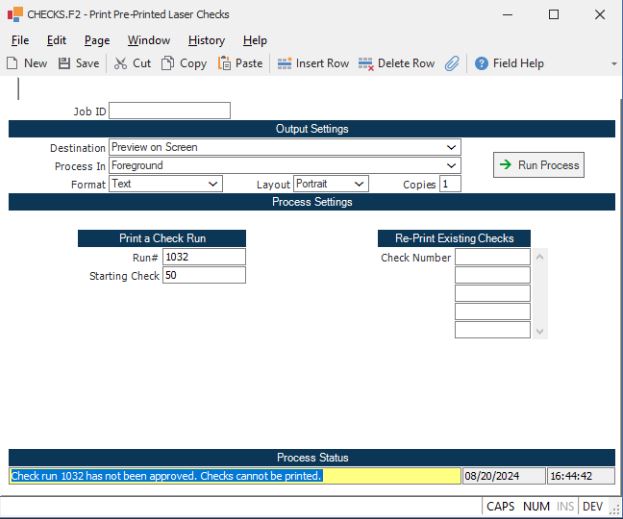
- Check runs cannot be printed or posted in CHECKS.P1 if the entire check run has not been approved
- An error will be generated if at least one precheck record remains unapproved at the time of printing or posting